|
This is not a PIC project, but a little example of serendipity !
Last day I managed to fry my easyPic board :-((((
That was my birthdate, happy birthday to me :-<< !
a full-charged 2µ2 180 V capacitor (coming from a nixie power supply on which I worked) discharged on the RB7 external connector pin of the board ...
the pic16f84 mounted on the board still worked but the RB7 did not work and stayed high. I removed the pic : the RB7 led was still on...
and on top of that it was impossible to programm any pic anymore ...
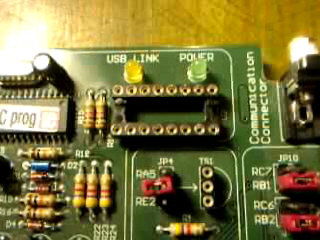
having a look on the easyPic2 schematic, I realized that the RB7 pin is the progamming pin and is connected to the external connector through the 4053.
the only way to know if other devices were damaged was to replace the 4053. With many cares it was not too difficult to remove it. I replaced it with a socket :
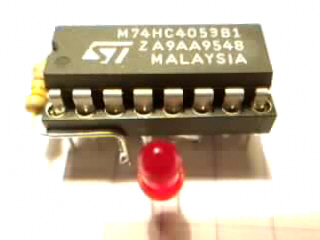
I put a brand new 4053 on the socked : it works ! the board was repaired !
but having a look closer to the schematic, it appears that a full switch of the 4053 was not used.
I don't like to have unused pins on a device !
this switch is controled by the programming signal command, so why don't use it to light a LED during the flash operation ?
another socket, a 330 ohms resistor and a little red LED will do the job :
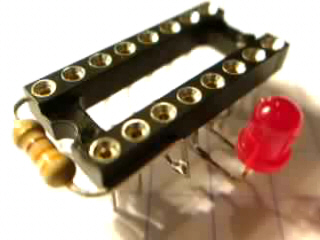
the 3Y0 input (socket pin 5) is connected to the ground (adjacent socket pin 6, /E is grounded)
the 3Y1 input (socket pin 3) is connected to the +5V (socket pin 16) through the 330 ohms resistor
the LED is connected to the ground (adjacent 3Y0 input is grounded), and to the 3Z output (socket pin 4).
socket pins 3, 4, 5 are shorted : they don't need to go into the board socket.
here is another view upside-down :
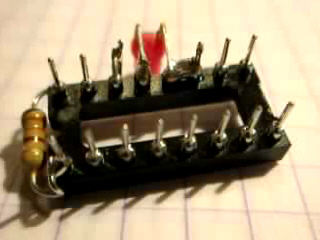
and this is the complete mini-board with its 4053 ready to be plugged :
plugging the mini-board on the board, the red LED takes place exactly in the middle between the yellow and green ones !
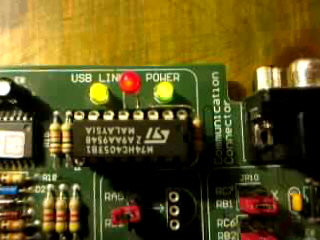
good, let's have a test : flashing a pic turns the red LED on, as expected !
LED off : normal operation, pic is running.
LED on : flash operation in progress, stand by !
Enjoy !
|
|
|
|
|